Change Materials, Colours & Objects in a Render Without Re-rendering
Clients always ask for "just one change". With ArkViz AI you can change a facade material, repaint a wall or swap furniture in a finished render in seconds — while the rest of the image stays exactly as it was. Two tools do this: Inpaint & Draw and Edit Layers.
Quick answer: To change part of an architectural render with ArkViz AI, open the render in app.arkviz.ai and either brush over the area you want to change (Inpaint & Draw) or click the detected element — a wall, sofa, lamp or curtain — in the Edit Layers panel. Then describe the change in a few words, such as "red brick cladding" or "change this wall colour to deep red", and apply. Only the selected area changes; the building, camera and lighting stay the same.
Brush over an area to replace it
Use Inpaint & Draw when you want to change a specific region of the image — a facade cladding, a feature wall, the sky, or an empty corner where you want to add trees, people or a car.
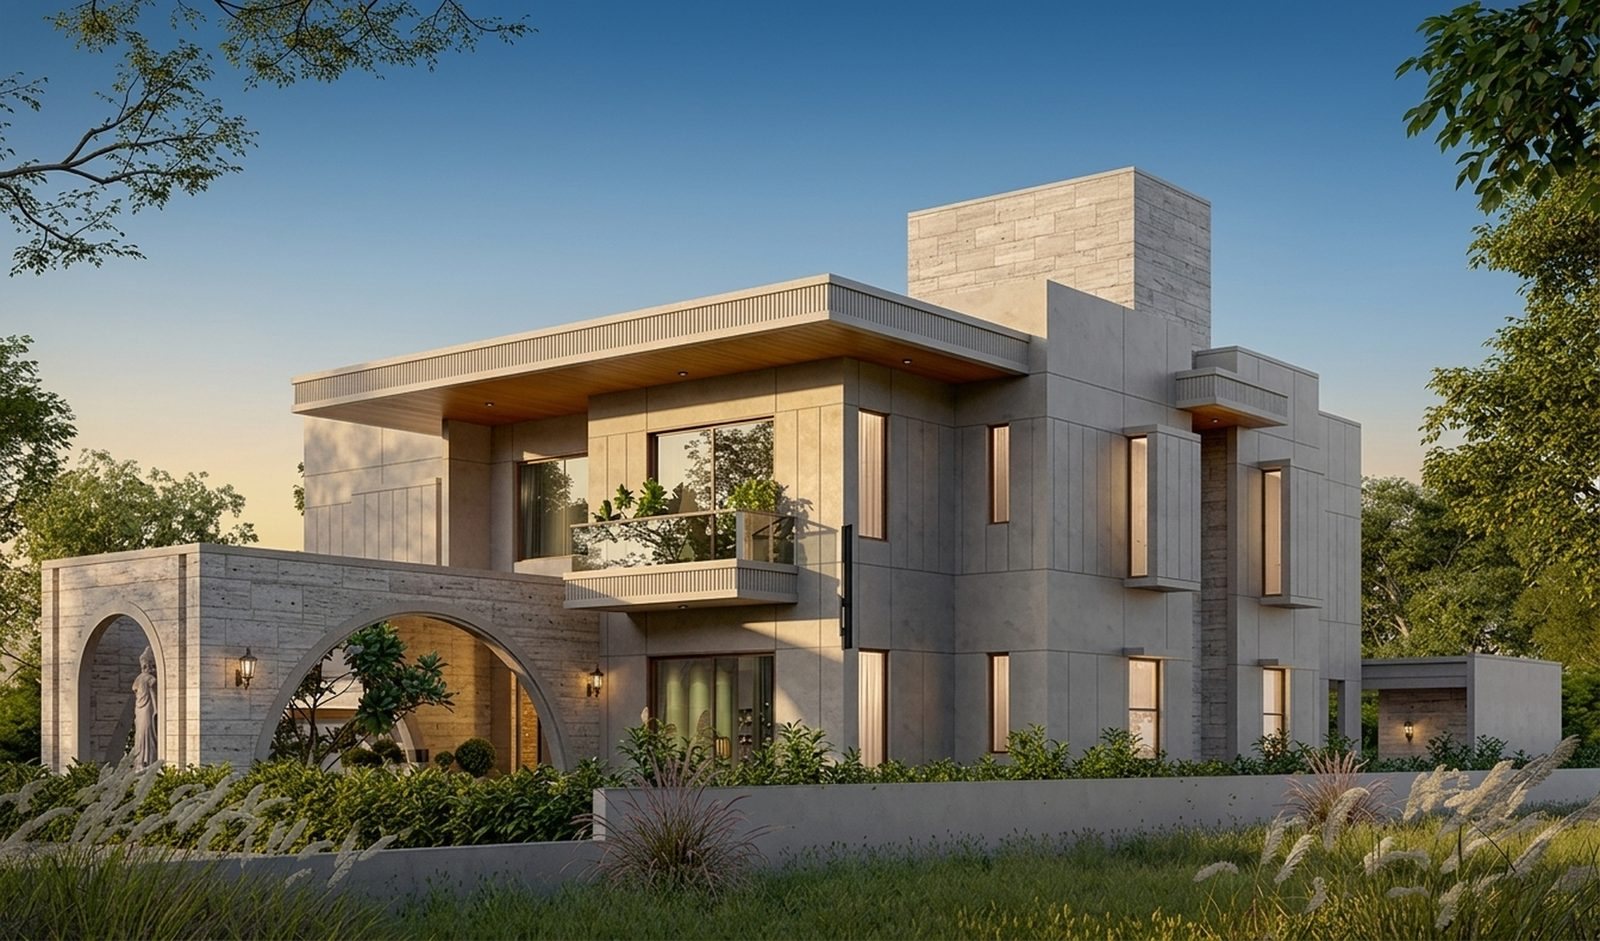
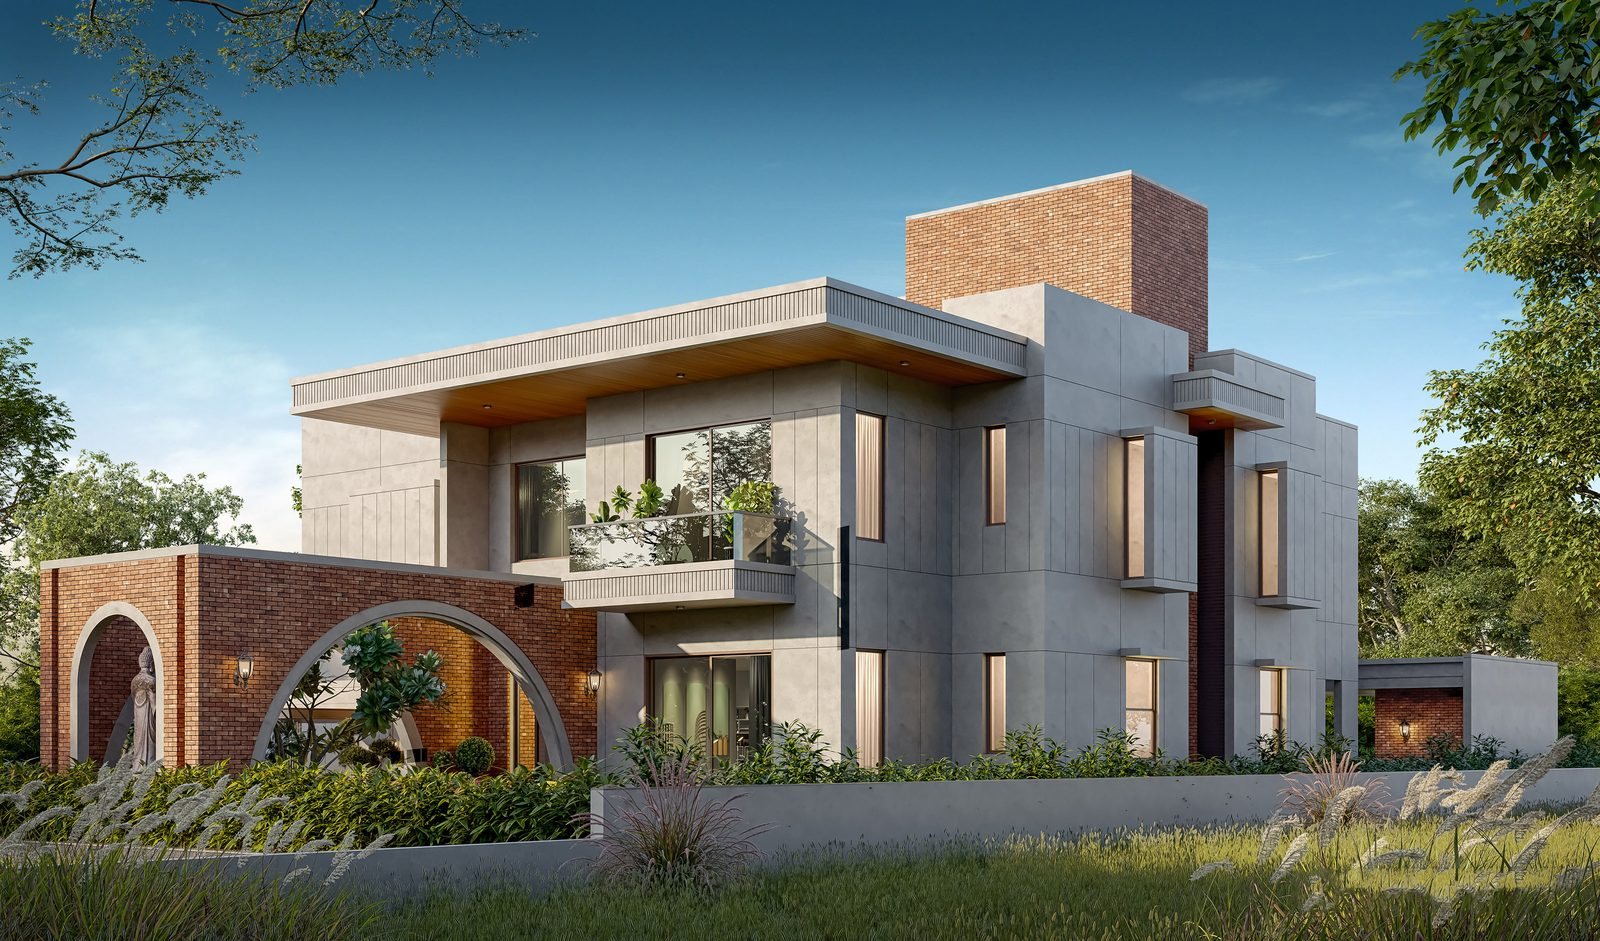
Stone cladding on the arched entrance wall and chimney changed to red brick. Drag the handle to compare — the rest of the villa, the garden and the light stay the same.
Open your render and choose Draw
Open any render in the app (or upload an existing one) and switch the source image to Draw.
Brush over the area to change
Paint over just the part you want to replace. Use the eraser to tidy the edges of your selection.
Describe the change and apply
Type a short instruction such as "red brick cladding" or "add a tall tree here", then apply. The AI redraws only the brushed area, matching the perspective and light of the scene.
Click an object to select it — no brushing needed
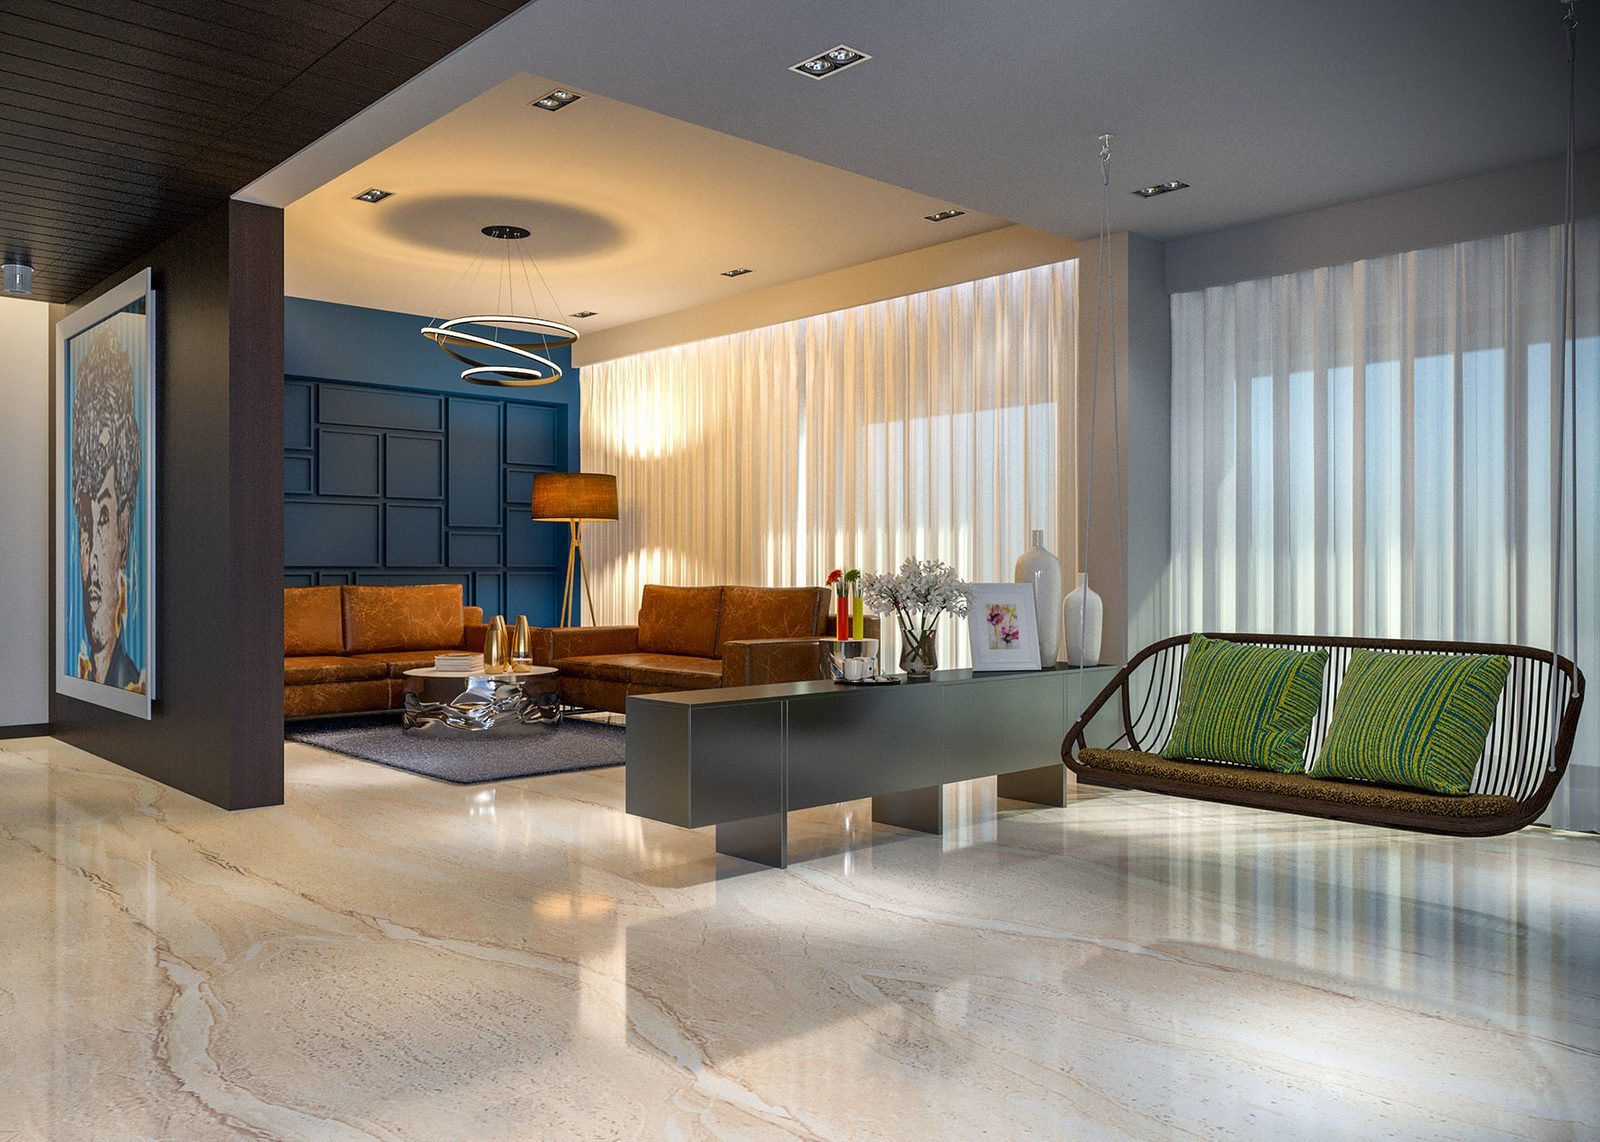
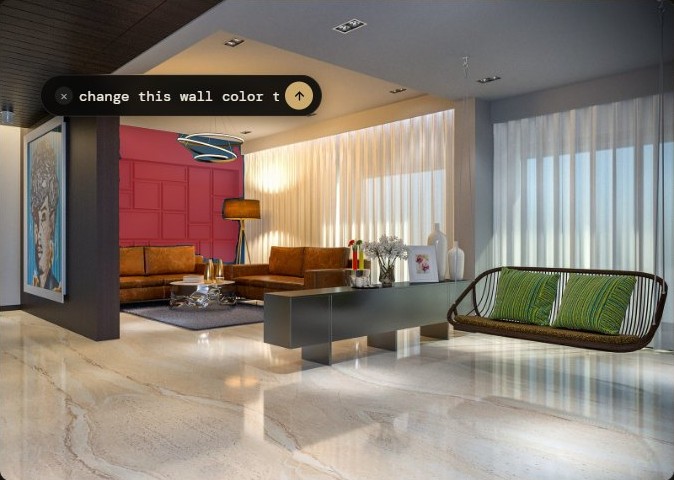
Edit Layers automatically detects the elements in your render and lists them by type — for example walls, sofas, decorative items, lamps and curtains. Instead of painting a mask, you simply click the element you want to change. It's the fastest way to make precise edits to interiors.
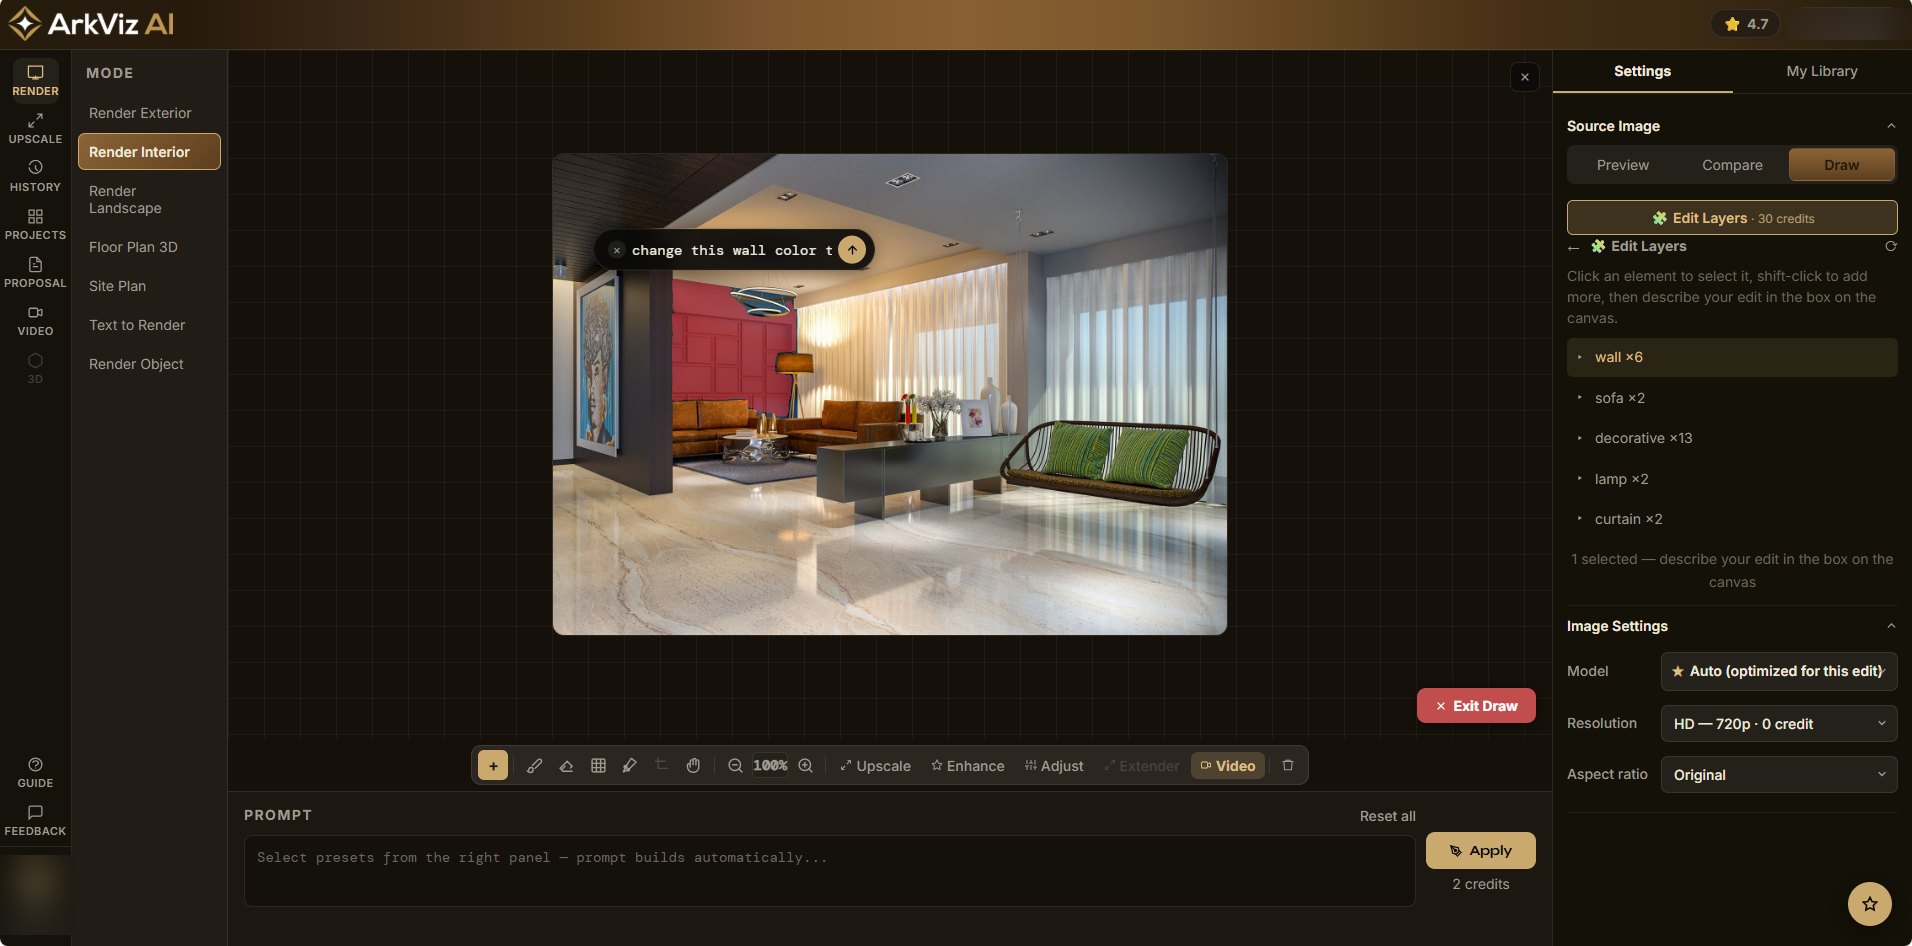
Open Edit Layers
With your render open in Draw, choose Edit Layers. ArkViz AI scans the image and lists every element it finds, grouped by type.
Click to select
Click an element on the image or in the list to select it. Shift-click to add more — for example, both sofas at once.
Describe your edit
Type what you want in the box on the canvas, such as "change this wall colour to deep red" or "replace with a grey fabric sofa", and apply. Only the selected elements change.
Inpaint & Draw or Edit Layers?
| You want to… | Best tool | Why |
|---|---|---|
| Change the colour or finish of a whole wall | Edit Layers | One click selects the exact wall, with clean edges |
| Swap a sofa, lamp, curtain or decor item | Edit Layers | Objects are detected for you; shift-click to change several at once |
| Change facade cladding on part of a building | Inpaint & Draw | Brush exactly the region you want, even across several surfaces |
| Add trees, people, cars or objects to empty space | Inpaint & Draw | There's no existing element to select, so paint where it should go |
| Remove something unwanted | Inpaint & Draw | Brush over it and describe what should be there instead |
Faster client revisions
In a traditional workflow, changing one material means going back to the 3D model, updating it, and rendering the whole scene again. Generating a brand-new AI render isn't much better: the building, furniture and camera can all come out slightly different, and the client has to review everything again.
Targeted editing keeps everything the client has already approved and changes only what they asked for — so you can show material options side by side, in minutes, during the same meeting.
Only what you choose changes
Everything outside your selection stays the same, so approved parts of the design remain untouched.
Matches the scene
New materials and objects follow the existing perspective, lighting and shadows.
Plain-language edits
Describe the change in a few everyday words. No technical prompt writing.
Tips for clean, realistic edits
- Be specific. "Red brick cladding" or "matte sage green paint" works better than "change material".
- Make one change at a time. Edit the wall, check it, then edit the sofa. Small steps are easier to control.
- Brush a little past the edges. When inpainting, cover the whole surface you want to change so no old material shows at the borders.
- Select every matching object. If there are two identical sofas, shift-click both so they stay consistent.
- Keep versions. Save each option so you can show the client "before" and several "after" choices.
Need the base render first? See SketchUp to render, Sketch to render or Floor plan to 3D.